
To start creating an html document you must first lunch your
text editor or notepad as the case may be.
Every html document are save with “.html” in other for the
browser to read the document and interpret the file for the user.
Now let take a look
on how to start writing our html document.
Before you start writing an html code it must start with an
open tag <> and end with a closed tag </>.
Now the element name is written in between the tag bracket
like this <h1> the h1 is the element name
And when writing the closed tag you write it in this format
</h1> .
Now when writing an html document it must begin with the
open tag element and end with a close tag element. Eg <h1> content
displayed </h1>.
The content that will be displayed on the browser is written
in between the element name.
Let us see how to
start writing an html file.
Take a proper look at this example.
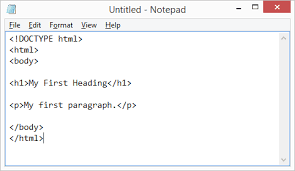
<!DOCTYPE html>
<html> < ---opening tad of the html element-------------------------|
<head> < --opening tag of the head element -----| |
<meta charset="utf-8"> | |
<title>Title here</title> | |
</head> < --closing tag of the head element ->----| |
<body> < -- opening tag of the body element ----------| |
Page content goes here. | |
</body> < -- closing tag of the body element -------------| |
</html> < -- closing tag of the html elemen ______________________|
Step 1: the first
line in the example isn’t an element at all; it is a document type declaration
(also called DOCTYPE declaration) that identifies this document as an HTML5 document.
So you can start your with it. Including it lets modern browsers know they
should interpret the document as written according to the HTML5 specification.
Step 2: The entire
document is contained within an html element<html>. The html element is
called the root element because it contains all the elements in the document,
and it may not be contained within any other element. It is used for both HTML
and XHTML documents.
Step 3: Within the html element, the document is divided
into a head<head> and a body <body>. The head element contains
descriptive information about the document itself, such as its title, the style
sheet(s) it uses, scripts, and other types of “meta” information. The meta
elements within the head element provide information about the document itself.
A meta element can be used to provide all sorts of information, but in this
case, it specifies the character encoding (the standardized collection of
letters, numbers, and symbols) used in the document. I don’t want to go into
too much detail on this right now, but know that there are many good reasons
for specifying the “charset” in every document, so I have included it as part
of the minimal document structure.
Step 4: Also in the “head” is the mandatory “title” element<title>.
According to the HTML specification, every document must contain a descriptive
title. example <title> GEORGE HANDWORK</title>.
Finally, the “body” element<body> contains everything that we want to show up in
the browser window.
Time to test what we learnt so far.
1 open your editor and test yourself with this code.
2. Start by adding the HTML5
DOCTYPE declaration:
<!DOCTYPE html>
3. Put the entire document in
an HTML root element by adding an <html> start tag at the very beginning and an
end <html> tag at
the end of the text.
4. Next, created the document
head that contains the title for the page. Insert <head> and </head> tags
before the content. Within the head element, add information about the
character encoding <meta charset="utf-8">, and the title, "George webpage",
surrounded by opening and closing <title> tags.
The correct terminology is to
say that the title element is nested within the head element. We’ll
talk about nesting more in later chapters.
5. Finally, define the body
of the document by wrapping the content in <body> and </body> tags.
When you are done, the source document should look like this (the markup is shown in color to
make it stand out):
<!DOCTYPE html>
<html>
<head>
<meta charset ="utf-8">
<title>George Webpage</title>
</head>
<body>
The TEST
Now is a good time to make sure you understand the basics of markup.
Use what you’ve learned in this chapter to answer the following questions
PROBLEM SOVED
It could be you didn’t save your document before
reloading,
or you may have saved it in a different directory.
</body>
</html>
6. now save the file with any name you like" .html" example "myweb.html"
Android users
For android users open your “ WPS OFFICE “ click on the + button select “new document”
choose “blank” now copy and paste your code or type in your code, after that
click the save button in the top after the “edit” button. Now select ideal “phone”
or “sdcard” , now type the name of your
file and on the right corner tap and select “.txt” click save. Go-to your file
manager select the storage part you save it to, scroll and look for the file,
then rename with “.html” and save. now tape the file and select a browser to open
the file.


0 comments:
Post a Comment